Logitech MX Master 2S Wireless Mouse Review
February 22, 2024
VENOEN Firewall Micro Appliance 2.5gbe Firewall mini PC Celeron J4125 Review
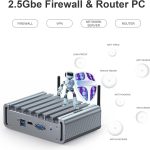
February 22, 2024If you’re looking to enhance the security and management of your network, pfSense is an open-source firewall and router platform that might just be the solution you need. This comprehensive guide will walk you through the process of installing pfSense from USB on a physical appliance, making it accessible even for beginners. You’ll learn about the minimum hardware requirements, downloading the pfSense image, creating a bootable USB drive, connecting to pfSense using puTTY, and configuring pfSense via Web GUI. Additionally, this article addresses common questions about the compatibility of pfSense with routers, virtual machines, Raspberry Pi, and its RAM requirements. Whether you’re managing a small business or a large enterprise, pfSense offers powerful features and customization options to keep your network secure.

Minimum Hardware Requirements
pfSense is a powerful firewall and router platform that can be installed on a physical appliance. Before installing pfSense, it is important to ensure that your hardware meets the minimum requirements. These requirements include a 64-bit CPU, 1 GB of RAM, 8 GB of disk space, and at least one compatible network interface.
A 64-bit CPU is essential for running pfSense, as it allows for better performance and supports advanced features. Ensure that your hardware has a 64-bit CPU before proceeding with the installation.
In terms of RAM, pfSense requires a minimum of 1 GB. This ensures that the system has enough memory to handle network traffic and perform various tasks. It is recommended to have more than 1 GB of RAM if you anticipate heavy network usage or have a larger number of clients connecting to your network.
Disk space is also an important consideration when installing pfSense. The minimum requirement is 8 GB, which allows for the installation of the operating system, packages, and log files. It is recommended to have more disk space if you plan on storing large amounts of data or logs.
Lastly, pfSense requires at least one compatible network interface. This interface allows pfSense to connect to your network and perform its firewall and routing functions. Ensure that your hardware has a network interface card that is compatible with pfSense.
By meeting these minimum hardware requirements, you can ensure that your pfSense installation will run smoothly and efficiently.
Downloading the pfSense Image
To install pfSense on a physical appliance, you will need to download the pfSense image. The image contains the necessary files and software to install and run pfSense on your hardware.
The first step is to choose the appropriate version of pfSense for your hardware. There are different versions available, such as the Community Edition (CE) and the Professional Support Subscription (PSS) version. The CE version is free and is sufficient for most users, while the PSS version offers additional features and support for a fee.
Next, you will need to access the pfSense website. Open your web browser and navigate to the pfSense website. Once on the website, look for the download section. This is where you can find the pfSense image files.
In the download section, you will find different versions and architectures of pfSense. Select the version that matches your hardware and download the appropriate image file. It is important to choose the correct version to ensure compatibility and optimal performance.
Creating a Bootable USB Drive
Now that you have downloaded the pfSense image, you will need to create a bootable USB drive. This will allow you to install pfSense on your physical appliance.
The first step is to format the USB drive. Insert the USB drive into your computer and open the disk management utility. Select the USB drive and choose the format option. Format the USB drive using a compatible file system, such as FAT32 or NTFS.
Next, you will need to extract the pfSense image that you downloaded earlier. Use a file extraction utility to extract the contents of the image file. This will create a folder with the necessary files for creating a bootable USB drive.
Now, you will need to use a USB bootable software to create the bootable USB drive. There are several software options available, such as Rufus or UNetbootin. Open the USB bootable software and select the USB drive as the destination. Choose the extracted pfSense files as the source and start the process. The software will copy the necessary files to the USB drive and make it bootable.
Once the process is complete, you can verify the bootable USB drive by restarting your computer and booting from the USB drive. If the pfSense installation process starts, then the USB drive is bootable and ready for use.
Setting Up the Connection to pfSense
Before you can start the pfSense installation process, you will need to set up the connection between your physical appliance and the network.
The first step is to physically connect the appliance to the network. Plug in the network cable into the appropriate network interface on the appliance. Ensure that the cable is securely connected to both the appliance and the network switch or router.
Next, you will need to check the network settings on your appliance. This can typically be done through the BIOS or UEFI settings. Access the appliance BIOS by restarting the system and pressing the designated key, usually displayed on the screen during startup. Once in the BIOS settings, navigate to the network settings and verify that the correct network interface is detected and enabled.
After confirming the network settings, you can proceed to configure the network interface. This can be done through the appliance BIOS or through the pfSense installation process. Follow the prompts or instructions provided to configure the network interface with the appropriate IP address, subnet mask, and gateway information.
By setting up the connection to pfSense correctly, you can ensure that your physical appliance is ready to communicate with the network and perform its firewall and routing functions.

Connecting to pfSense using puTTY
Once the pfSense installation is complete, you can connect to pfSense using puTTY. puTTY is a popular SSH client that allows you to remotely access and manage your pfSense appliance.
The first step is to download and install puTTY on your computer. Open your web browser and search for puTTY. Navigate to the official puTTY website and download the latest version of puTTY.
After downloading puTTY, you will need to configure the SSH connection. Open puTTY and enter the IP address of your pfSense appliance in the designated field. Ensure that the connection type is set to SSH and the port is set to the default port 22. Click on the “Open” button to start the SSH connection.
If the connection is successful, you will be prompted to enter your pfSense username and password. Enter the credentials that you set during the pfSense installation process. Once authenticated, you will have access to the pfSense command-line interface (CLI) and can manage your pfSense appliance remotely.
Booting pfSense from USB
To boot pfSense from USB, you will need to configure the boot order in the appliance BIOS. This will ensure that the appliance boots from the USB drive instead of the internal storage or other devices.
To access the appliance BIOS, restart the system and press the designated key, usually displayed on the screen during startup. Once in the BIOS settings, navigate to the boot order settings. Rearrange the boot order so that the USB drive is listed as the first boot device. Save the changes and exit the BIOS settings.
After configuring the boot order, the appliance will boot from the USB drive when restarted. Ensure that the USB drive with the pfSense image is connected to the appliance before restarting. The pfSense installation process will then begin and guide you through the necessary steps to install pfSense on the appliance.

Installing pfSense
Once the pfSense installation process starts, you will need to follow the prompts to install pfSense on your physical appliance.
Start by selecting the appropriate installation option. This can vary depending on your hardware and requirements. Choose the option that best suits your needs, such as a full installation or a custom installation with specific packages.
Next, you will need to accept the license agreement. Read through the agreement and press the designated key to accept the terms and continue with the installation.
After accepting the license agreement, you will be prompted to choose the installation disk. Select the disk or partition where you want to install pfSense. Make sure to choose the correct disk to avoid accidentally overwriting data on other drives.
Once you have selected the installation disk, the installation process will begin. Sit back and wait for the process to complete. Once the installation is finished, you can proceed to configure pfSense via the Web GUI.
Configuring pfSense via Web GUI
To configure pfSense, you can use the Web GUI, which provides a user-friendly interface for managing and customizing your pfSense appliance.
Access the pfSense Web GUI by opening your web browser and entering the IP address of your pfSense appliance in the address bar. Press enter to load the pfSense login page.
Enter the username and password that you set during the installation process. Once logged in, you will be taken to the pfSense dashboard, where you can configure various settings.
Start by configuring the network interfaces. This involves assigning the appropriate IP addresses, subnet masks, and gateway information to each interface. Navigate to the network settings section and follow the prompts to configure the interfaces.
Next, set up the WAN and LAN connections. The WAN connection is used to connect to the internet, while the LAN connection is used to connect to your internal network. Configure the WAN connection by selecting the appropriate settings, such as DHCP or static IP. Set up the LAN connection by assigning an IP address and subnet mask for your internal network.
Finally, configure the firewall rules to control inbound and outbound traffic. Navigate to the firewall settings and create rules based on your specific requirements. Specify the source and destination addresses, ports, and protocols for each rule.
By configuring pfSense via the Web GUI, you can customize and optimize your firewall and routing settings to meet your specific needs.
Frequently Asked Questions about pfSense
Can pfSense be installed on a router?
Yes, pfSense can be installed on a router. However, it is important to ensure that the router hardware meets the minimum requirements for running pfSense. Additionally, the installation process may vary depending on the specific router model and configuration.
What are the RAM requirements for pfSense?
The minimum RAM requirement for pfSense is 1 GB. However, it is recommended to have more than 1 GB of RAM if you anticipate heavy network traffic or have a larger number of clients connecting to your network. More RAM allows pfSense to handle multiple concurrent connections and perform its firewall and routing functions efficiently.
Is pfSense compatible with Raspberry Pi?
While pfSense is not officially supported on Raspberry Pi, there are community-driven projects that aim to port pfSense to the Raspberry Pi platform. These projects may have certain limitations and may not offer the same level of performance and features as the official pfSense releases. It is recommended to check the specific project documentation and forums for more information on compatibility and requirements.
Can pfSense be used in virtual machines?
Yes, pfSense can be installed and used in virtual machines. It is a popular choice for virtualized environments, as it offers powerful firewall and routing capabilities. By running pfSense in a virtual machine, you can leverage the flexibility and scalability of virtualization while ensuring network security and performance.
Conclusion
In conclusion, pfSense is a versatile and powerful solution for securing networks and managing data. By following this comprehensive guide, you can install pfSense from USB on a physical appliance and configure it to meet your specific requirements.
pfSense offers a range of features and customization options, making it suitable for both small businesses and large enterprises. Its open-source nature allows for continuous development and improvements, ensuring that it remains a reliable and effective solution for network security.
By meeting the minimum hardware requirements, downloading the pfSense image, creating a bootable USB drive, setting up the connection to pfSense, connecting to pfSense using puTTY, booting pfSense from USB, installing pfSense, and configuring pfSense via the Web GUI, you can take full advantage of the features and benefits that pfSense has to offer.
Remember, network security is of utmost importance in today’s digital world. By implementing a robust firewall and router solution like pfSense, you can protect your network, manage data effectively, and ensure the smooth operation of your business or organization.


